How to Install & Lay Carpet:
6 Easy Steps
New carpet and carpet padding, or carpet cushion, feels luxurious and indulgent. It’s a gift to your feet and can express your family’s personality and lifestyle. No matter what carpet you’re looking for, luxury styles are available that can give you performance and value.
Step 1 – Choosing the Right Carpet Type For You
At Surface+, we have many carpet brands to choose from, as well as a variety of types of carpet.
Carpet comes in major cut types: plush (or cut) pile, cut-and-loop pile, and commercial loop. Each of those types of carpet is made of different types of fiber, both natural (such as Wool, Sea Grass, Sisal, and Coir) or synthetic (such as nylon, polyester, acrylic, or olefin).
High-traffic areas benefit from flecks of subtle color or texture in carpet fibers that help hide soil and footprints. Formal areas come alive with plush carpet that is truly a treat for the eyes and feet.
There are eco-friendly, stain-resistant, wear-resistant, mold, and mildew-resistant carpets available today.
When it comes to investing in a new carpet it's crucial that you consider a variety of options. Choose only professional installers that will evaluate your home’s living spaces to be certain you choose the best type of carpet, the right carpet cut, carpet padding, and carpet fiber possible for your needs.
Step 2 – Replacing Existing Carpet
Pulling up old carpet can be a difficult task. Years of use, especially if there have been pets in the home; can leave your carpet full of dirt and animal hair. When considering carpet replacement, it's important to consider a professional carpet installer. Installers protect themselves by wearing a mask. They remove any moldings around the floor and at the door and begin to cut out the old carpet carefully.
Step 3 – Laying the Underpad
The installer should clean and dry your floor thoroughly. The cleaner the underfloor is, the cleaner the carpet will ultimately feel. The installer may leave existing tackless strips. If there are none, they will install new strips.
Next, the old carpet cushion will be removed and replaced with the new carpet padding, creating a huge difference in the feel and performance of your new carpet.
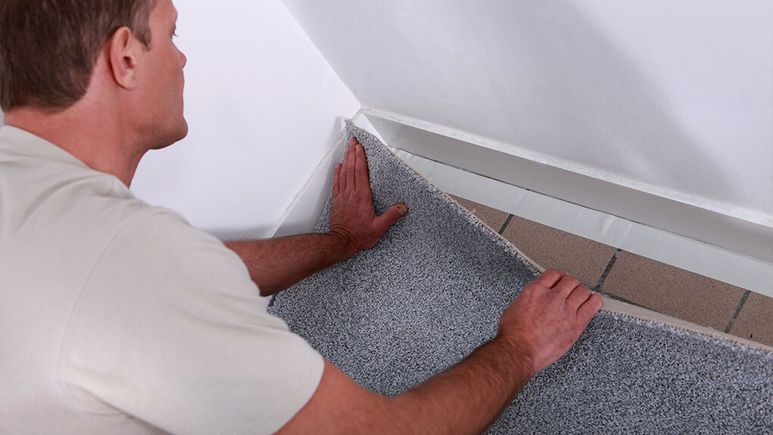
Step 4 – Laying the New Carpet
Carpet pieces must be slightly larger than the room in question with an overlay of up to six inches. Trimming this overlay can be tricky, and it’s extremely important during the carpet replacement that it be cut correctly. Our expert installers get it right the first time, preventing any new carpet waste or damage.
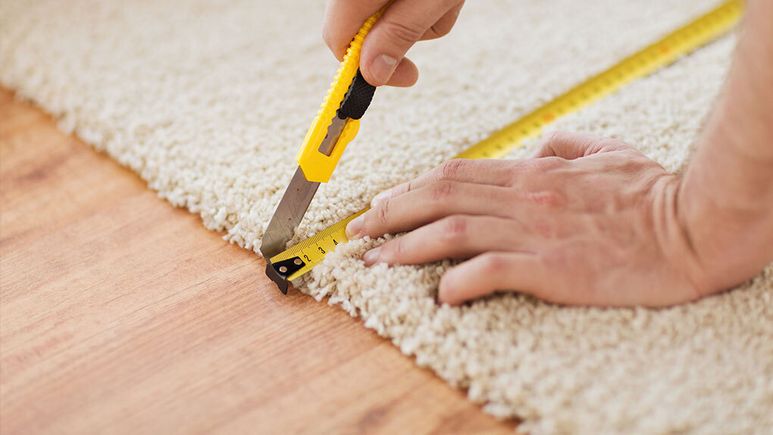
Step 5 – Match Up Carpet Seams
Most rooms require more than one piece of carpet. This is typical because of the way wall-to-wall carpet must be cut to ensure the pattern matches up correctly. The carpet is cut with the utmost precision so the seams line up perfectly.
Seam tape is used to join the two seams. Seams between two pieces of carpet must be cut at the same time, or their edges won’t match exactly. The seaming tape must be used correctly with a steaming iron and carpet roller or the seams won’t fully seal.
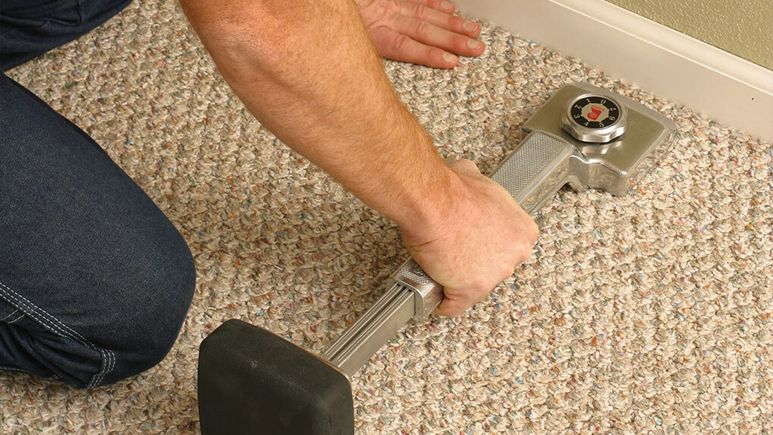
Step 6 – Stretching and Attaching the Carpet
To finish the installation, the carpet must be stretched using first a “knee kicker” and then a carpet spreader to attach to the tackless strips along each wall. Stretching should be followed up by final wall trimming, tucking at the walls, and reinstallation of the molding at the baseboards.
Begin taking steps toward the easy-care carpet floor you’ve always wanted. Experience the easy maintenance, durability, and virtually unlimited design options that carpet can offer you. Our experts are waiting to guide you to the flooring of your dreams!
Step 1 – Choosing the Right Carpet Type For You
At Surface+, we have many carpet brands to choose from, as well as a variety of types of carpet.
Carpet comes in major cut types: plush (or cut) pile, cut-and-loop pile, and commercial loop. Each of those types of carpet is made of different types of fiber, both natural (such as Wool, Sea Grass, Sisal, and Coir) or synthetic (such as nylon, polyester, acrylic, or olefin).
High-traffic areas benefit from flecks of subtle color or texture in carpet fibers that help hide soil and footprints. Formal areas come alive with plush carpet that is truly a treat for the eyes and feet.
There are eco-friendly, stain-resistant, wear-resistant, mold, and mildew-resistant carpets available today.
When it comes to investing in a new carpet it's crucial that you consider a variety of options. Choose only professional installers that will evaluate your home’s living spaces to be certain you choose the best type of carpet, the right carpet cut, carpet padding, and carpet fiber possible for your needs.
Step 2 – Replacing Existing Carpet
Pulling up old carpet can be a difficult task. Years of use, especially if there have been pets in the home; can leave your carpet full of dirt and animal hair. When considering carpet replacement, it's important to consider a professional carpet installer. Installers protect themselves by wearing a mask. They remove any moldings around the floor and at the door and begin to cut out the old carpet carefully.
Step 3 – Laying the Underpad
The installer should clean and dry your floor thoroughly. The cleaner the underfloor is, the cleaner the carpet will ultimately feel. The installer may leave existing tackless strips. If there are none, they will install new strips.
Next, the old carpet cushion will be removed and replaced with the new carpet padding, creating a huge difference in the feel and performance of your new carpet.
Step 4 – Laying the New Carpet
Carpet pieces must be slightly larger than the room in question with an overlay of up to six inches. Trimming this overlay can be tricky, and it’s extremely important during the carpet replacement that it be cut correctly. Our expert installers get it right the first time, preventing any new carpet waste or damage.
Step 5 – Match Up Carpet Seams
Most rooms require more than one piece of carpet. This is typical because of the way wall-to-wall carpet must be cut to ensure the pattern matches up correctly. The carpet is cut with the utmost precision so the seams line up perfectly.
Seam tape is used to join the two seams. Seams between two pieces of carpet must be cut at the same time, or their edges won’t match exactly. The seaming tape must be used correctly with a steaming iron and carpet roller or the seams won’t fully seal.
Step 6 – Stretching and Attaching the Carpet
To finish the installation, the carpet must be stretched using first a “knee kicker” and then a carpet spreader to attach to the tackless strips along each wall. Stretching should be followed up by final wall trimming, tucking at the walls, and reinstallation of the molding at the baseboards.
Begin taking steps toward the easy-care carpet floor you’ve always wanted. Experience the easy maintenance, durability, and virtually unlimited design options that carpet can offer you. Our experts are waiting to guide you to the flooring of your dreams!
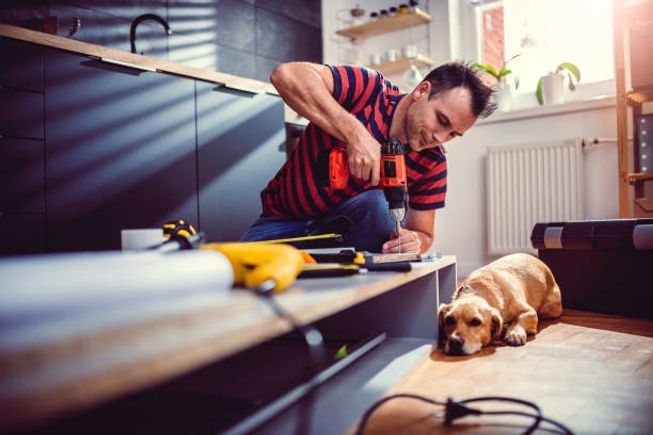
The Signs of Poor Renovation
in the Kitchen
We interviewed many builders, designers, and our clients, and singled out the leading 8 points:
⠀
1. Uneven walls and ceilings. The most common problem after renovation. You should always measure the surfaces after finishing work! Otherwise, the furniture will be uneven, and there will be gaps.
⠀
2. Joints. Always pay attention to them. Perfect joints are one of the main hallmarks of a good renovation. Pay attention to them everywhere: on the wallpaper, backsplash, and countertop, on the baseboards, flooring, and much more. Everything should be smooth and symmetrical.
⠀
3. Uneven apron. The cracks are visible. Many people are trying to join the apron tile and the tabletop without paneled sides, so it is more aesthetically pleasing, but here very skillful specialists are required. Gaps may appear when you install countertops (very often).
⠀
4. The sockets and switches are out of place. It happens that the socket is located above the stove or the light switch is slightly covered by the pencil case from the headset. Plan it ahead.
⠀
5. Cheap materials for decoration. For the kitchen, it is necessary to choose special coatings that have certain properties, such as reliability, durability, impact resistance, moisture resistance, and others. And sometimes you go up to the wall and run your finger, paint remains on your finger. This is not permissible. Yes, and building sometimes sins, buying cheap in order to save money and earn more. Check your checks!
⠀
6. Incorrect light. For example, ceiling lights are obstructed by hanging shelves that are too deep, or a window is obstructing a pencil case. It happens that the kitchen is made ideally for the ceiling, but the facades cannot be opened, as protruding spots interfere.
⠀
7. The floor tiles are not straight. On the one hand, a solid square, and on the other, cropped. It is necessary to do the same from all sides. For this, there are special calculation programs.
⠀
8. Drafts from cracks. This should be previously known and tested in the first place.

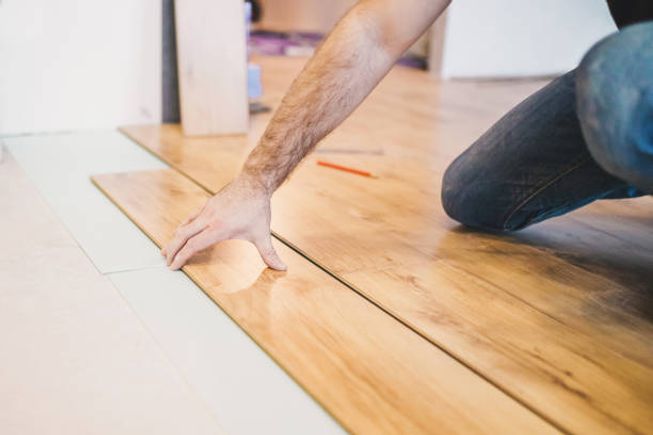

11 Useful Rules of Laying Laminate
(for the prolonged period of serving)
1. ✅The laminate should be acclimatized at the facility within 48 hours after delivery, just fold the packs horizontally on a flat surface without opening them. Do not neglect this, because it is not known how the laminate was stored.
2. ✅When buying a laminate, be sure to take it with a margin, but do not go too far with the quantity. The number depends on the type of layout and the room itself. For straight chaotic stacking + 5% margin, for shifting 1/3 of the board not less than + 7%, diagonal or 1/2 board + 10%. If you have chosen a laminate with a herringbone layout, then the margin is 15%.
3. ✅The substrate to the laminate should not be thick, not thicker than 3 mm, and at the same time it is better if it is elastic, the substrate must be selected individually for the laminate and the base on which it will be laid. If the laminate manufacturer has its underlayment, then it is better to choose that one.
4. ✅Under natural substrates (underlayment, coniferous), be sure to lay a vapor barrier film of 100-200 microns. The film plays a huge role, does not allow residual moisture from the screed to get into the laminate, on the contrary, it prevents the concrete from sucking moisture out of the wood. And the film also provides better mobility of the laminate web.
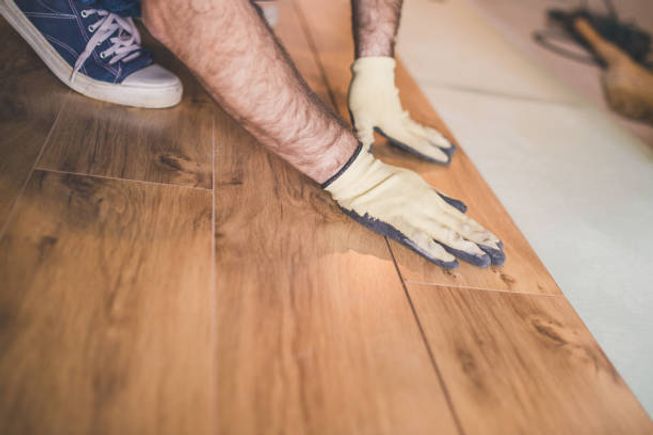
5. ✅Laminate is a free-lying covering, there must be gaps of about 10 mm from walls or other structures, the laminate can't be partially glued or fixed in other ways (sometimes we deviate from this rule, taking risks, but this does not cancel the rule). Not every master can correctly perform the trick by gluing the laminate. First, you need to spend a lot of time evaluating the room, for example, we have our own "secret" chips.
6. ✅The screed must be dry and have a residual moisture content of no more than 4%, it is better to make sure of this in advance. This is checked with a hygrometer, or with a piece of film (meter by meter), which is glued around the perimeter with tape to the base, a napkin is placed under it and left overnight. In the morning, you will understand whether the screed is dry or not.
7. ✅The door slots must have technical breaks (sills), which, unfortunately, no one wants to make. But it is not always possible to deviate from this rule, and not every handler knows how to do it correctly. For example, we have our own criteria by which we assess and give our recommendations, and experience says that they are almost infallible.
8. ✅The base must be stable, even, and solid, a maximum difference of 3 mm per 2 meters rule is permissible (measured using the usual 2-meter rule).
9. ✅Before laying, the base must be cleaned of build-ups of putty, paint, and other debris, it must also be well vacuumed. Ideally primed.
10. ✅When laying, be sure to control the offset of the laminate boards between the rows, it must be at least 20 cm.
11. ✅Be sure to control the repeatability of the board pattern and do not lay identical boards next to each other - a very common mistake, even among professionals. First, open 3-4 packs and layout the laminate according to the pattern, so it will be easier to pick up. The probability of repetition of the drawing on the boards, if this is not done - 99%.
Enjoy your laminate flooring!